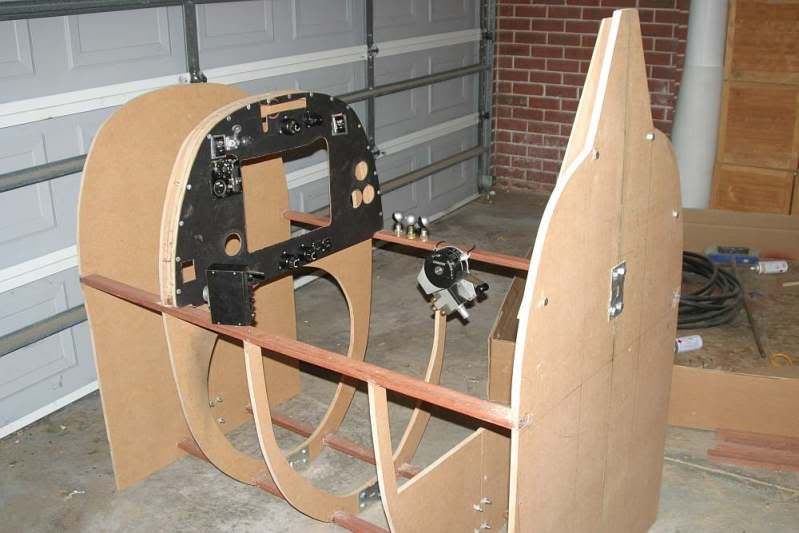
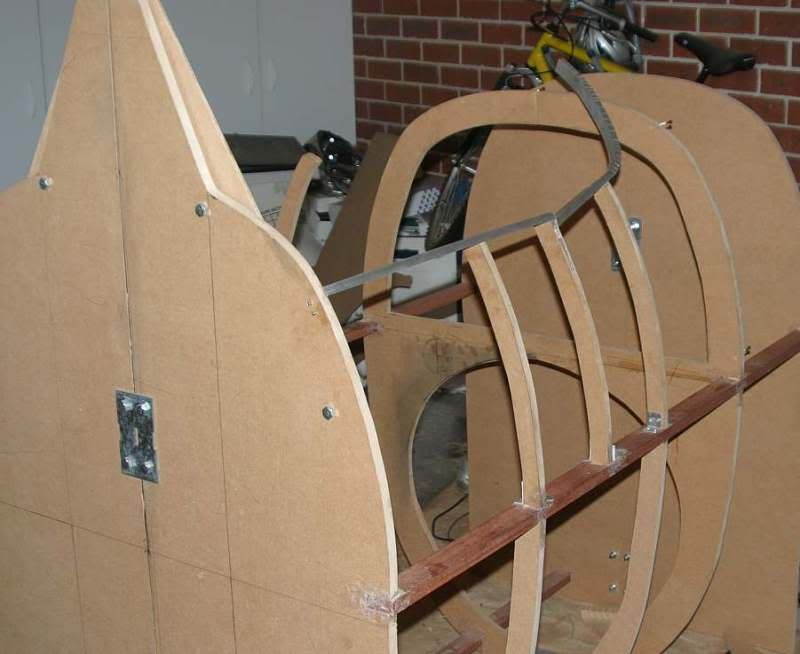
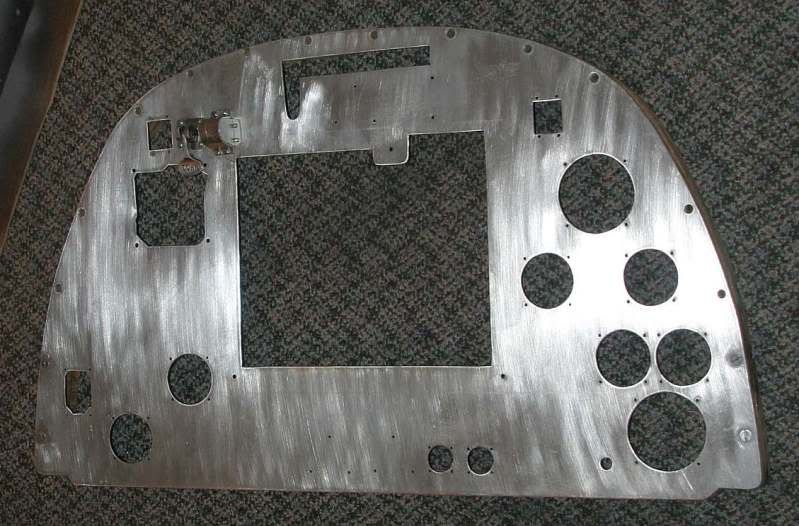
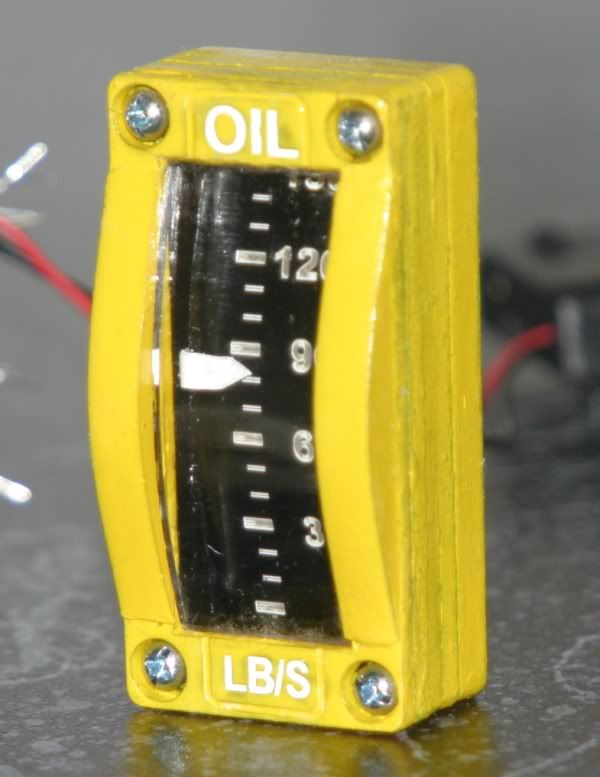
Spitfire K9817 Build

Forever, Britain's most cherished Crown Jewel
User avatar
Killratio
A2A Spitfire Crew Chief
Posts: 5785
Joined: 29 Jul 2008, 23:41
Location: The South West of the large island off the north coast of Tasmania
Contact:

Re: Accusim & the single Spitfire...Simulator Cockpit

Post by Killratio »

Oh well......


I guess I will just have to admit it is "completion anxiety" after all. After a late night and, um, a single drink (or maybe two) which went to my head I couldn't face the guide today....

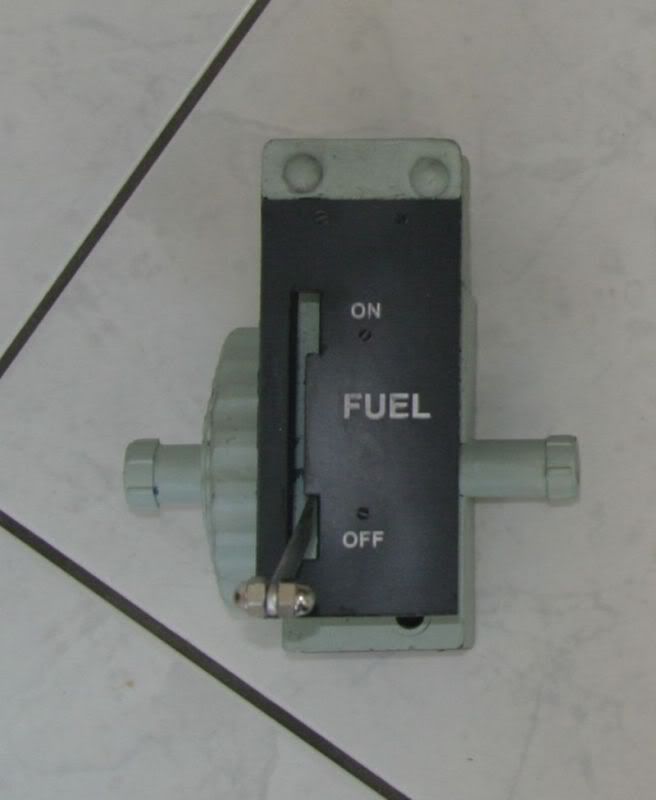
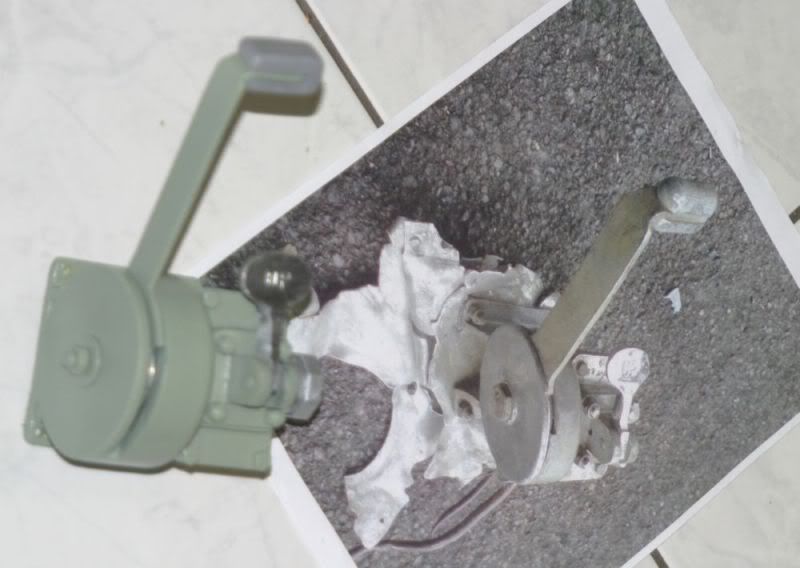
But I DID notice that the cupscrew that is the axle for the door latch did not look right...so I turned a faux locking cap for the axle and it came up quite well.
I did manage to break my parting tool in the process (on aluminium no more/less!!) but that was not wholey uexpected as it was never quite "right" for my lathe. I will now search for a new one.


Image

Image


The real thing:


Image

And a quick start to the paint job for the door:


Image

Image


Will it never end???????
<Sent from my 1988 Sony Walkman with Dolby Noise Reduction and 24" earphone cord extension>


Image

User avatar
Killratio
A2A Spitfire Crew Chief
Posts: 5785
Joined: 29 Jul 2008, 23:41
Location: The South West of the large island off the north coast of Tasmania
Contact:

Re: Accusim & the single Spitfire...Simulator Cockpit

Post by Killratio »

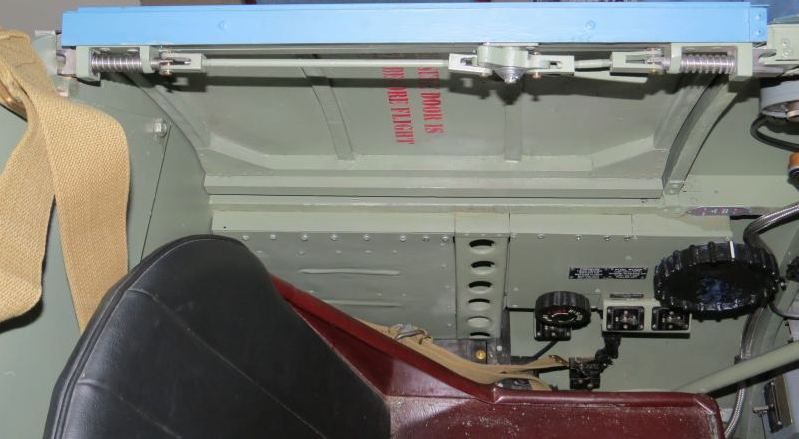
Stencil done...the door is actually out of plum, the warning looks almost straight when you are sat in the cockpit.

Image
<Sent from my 1988 Sony Walkman with Dolby Noise Reduction and 24" earphone cord extension>


Image

User avatar
c300c
Airman
Posts: 44
Joined: 15 Oct 2012, 11:23
Location: EDDI / EDBB

Re: Accusim & the single Spitfire...Simulator Cockpit

Post by c300c »

Wow, this is absolutely stunning! Keep up the great work / patience and thx for sharing.

User avatar
Killratio
A2A Spitfire Crew Chief
Posts: 5785
Joined: 29 Jul 2008, 23:41
Location: The South West of the large island off the north coast of Tasmania
Contact:

Re: Accusim & the single Spitfire...Simulator Cockpit

Post by Killratio »

Thanks c300c, and it's my pleasure,

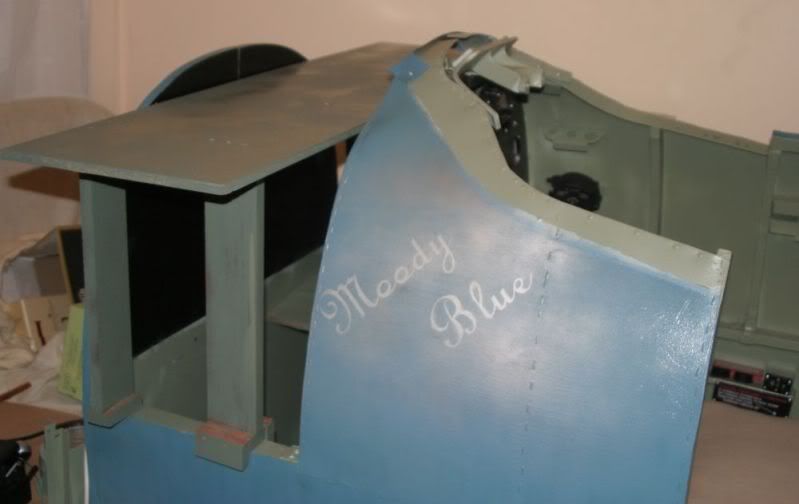
I should have mentioned, the sign was done the same way I did "Moody Blue". Chris laser cut a paper stencil with "sticky" back. This was transfered to the door and sprayed white first. The final colour is "engine red", the best and closest paint I could get to a flat red. It is a bit shiny but will fade. Because it is engine paint, it is also fairly thick and so stands a little proud..which is inaccurate but certainly made cleaning up any seepage under the stencil much easier.
Overall I'm very pleased.

Next job is the second (rear) latch guide this weekend. I've put that off as far as I can now that I won't have the lathe. I'm not really sure what scares me about it, except maybe hand filing the "square" hole to be firmly fit with the claw...the front one is absolutely smooth now that the keyway is painted..hope it wasn't a fluke :) ;)


Darryl
<Sent from my 1988 Sony Walkman with Dolby Noise Reduction and 24" earphone cord extension>


Image

User avatar
Killratio
A2A Spitfire Crew Chief
Posts: 5785
Joined: 29 Jul 2008, 23:41
Location: The South West of the large island off the north coast of Tasmania
Contact:

Re: Accusim & the single Spitfire...Simulator Cockpit

Post by Killratio »

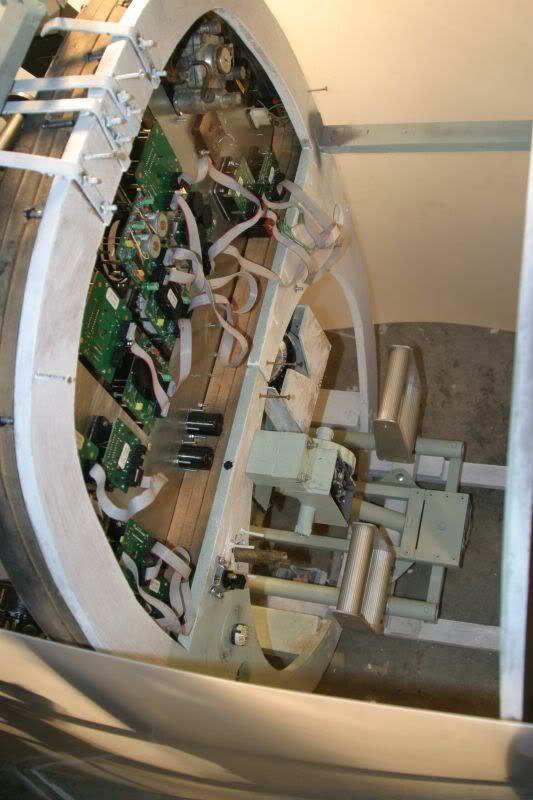
Probably the last update here, as all the "visible" stuff is now done. There is only some technical under the hood detail and mechanicing to go.

This time I thought I would show some of the process whereby solid chunks of metal become useful things. This is fairly new to me, so I apologise in advance for boring anone with a metalwork background. I am still at the wide eyed stage as stuff begins to take shape!

I'll also apologise to those I owe emails etc. Life is complicated just now and I've been racing to finish this before the really complicated stuff starts. Anyhow.....

...I have now finished the door, its associated locks and the door pier and slots for the fitting.

To start I drilled the 16mm hole in the end of the bar stock, which hole will eventually become the square hole in the guide.I did this first as last time I learned that the cut down guide is not very stable in the vice, after large portions of material have been removed. Then I began to carve away the centre of the latch guide.

You can just see the edge of the hole in the right of the picture as the cutting begins.

Image


Image


As material "disappears" the shape starts to look vaguely familiar.

Image


The first (front) side finished, now time to start carving out the rear part.


Image

Image

Image

(The middle swathe will be taken out last. On the front latch guide I used a 20mm cutter twice which caused some vibration etc..so this time I used a 16mm with a slower speed and that worked better..but meant three sections had to be cut instead of two. Time vs tool vs material..there is quite a bit to get your head around with this milling lark!!)


Image

Image

Image


The job starts to look even more like a latch guide. (about an hour and a half to here with setting up, measuring and cutting)


Next, testing size, position and general comparison to the front guide.

Image

Image


Domed rear end of guide started (at this point there is still over 1mm finishing cut to be taken off one side, you can see the hole is not central) This just fit with the bar stock size and not having to trim BOTH sides of the bar (another simple thing I had to learn LAST time!!)

Image


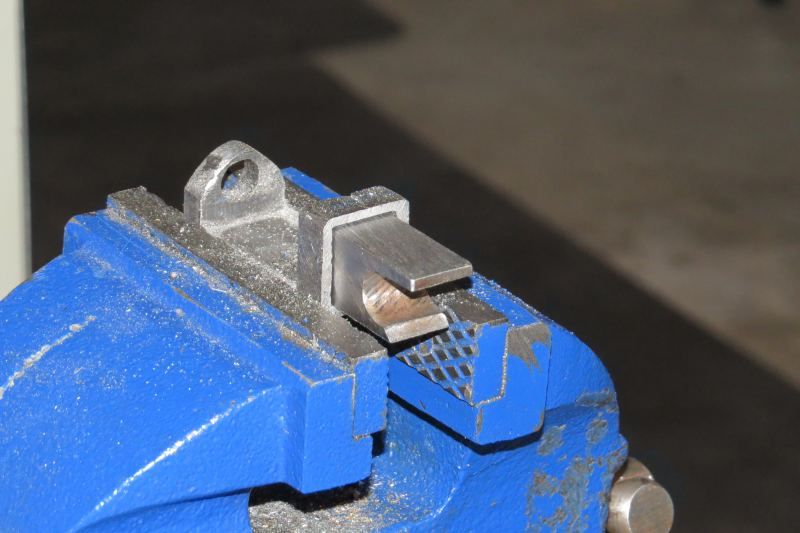
The small cutter machining and fine hand filing begin to convert the round 16mm hole into an 18mm x 16mm rectangular hole with squared corners.

Image


An hour, some fine hand filing and two broken 4mm cutters later, the claw starts to get close to fitting into the (only now) "squaring" hole.

Image


Finished, fitted and painted. The door on half lock. Just like the original the front claw fits around the door pier on half lock. The rear claw slides into the outside hole in the seat back frame and the canopy rail (I guess that is how the real one works too, from the dimensions..but I am not sure.

Image


And full... the front claw sits inside the door pier and the rear sits in both the holes in the frame.

Image


A very snug (MUCH to my relief!) fitting door and latch.

Image


And the view from afar....

Image

Image

Image


(if you don't mention that the is a different colour, even though from the same tin of paint, due to the main body floor seal coating fading over time, then I won't..)
<Sent from my 1988 Sony Walkman with Dolby Noise Reduction and 24" earphone cord extension>


Image

NickD
Airman First Class
Posts: 68
Joined: 01 Feb 2011, 16:01
Location: An island off the West Coast of Scotland

Re: Accusim & the single Spitfire...Simulator Cockpit

Post by NickD »

Are you able to 'fly' using your instruments or do you have to use the FSX panel? If so how can you convert 'real' instruments to work with data from FSX/P3dv2?

I have started collecting as many original instruments as poss, have the 'rectangular' type oil and fuel preassure gauges, an original Morse Signal key box and know where I can lay hands on El Trim gauge but dont want to part with more cash if they cannot be made to work properly...

Regards,

Nick
Regards,

Nick

User avatar
Norforce
Senior Master Sergeant
Posts: 1894
Joined: 09 Apr 2010, 17:14
Location: Geraldton, Western Australia

Re: Accusim & the single Spitfire...Simulator Cockpit

Post by Norforce »

NickD wrote:Are you able to 'fly' using your instruments or do you have to use the FSX panel? If so how can you convert 'real' instruments to work with data from FSX/P3dv2?

I have started collecting as many original instruments as poss, have the 'rectangular' type oil and fuel preassure gauges, an original Morse Signal key box and know where I can lay hands on El Trim gauge but dont want to part with more cash if they cannot be made to work properly...

Regards,

Nick
Read this thread from start to finish if you haven't all ready it is a blow by blow build :-)
Ron
B-17 AIRFRAME 710 HRS PLUS AND CLIMBING
ImageImageImageImage


Image
GIGABYTE X58A-UD5 MB, INTEL I7 950, 12GB DOMINATOR-GT DDR3 RAM, WIN7 64, GIGABYTE SUPER OVER CLOCK GTX 560 TI 1GB GGDDR5 1000Mz, CORSAIR 850W PS, NOCTUA NH-D14,
TRACKIR 5 & TrackClipPro

User avatar
Eriksson40
Airman
Posts: 12
Joined: 03 Jun 2013, 16:05

Re: Accusim & the single Spitfire...Simulator Cockpit

Post by Eriksson40 »

Hey Killratio, do you still have any pictures of your simpit build somewhere.
Those who are in this thread seems to have expired. :(

Regards,
Anders

User avatar
Killratio
A2A Spitfire Crew Chief
Posts: 5785
Joined: 29 Jul 2008, 23:41
Location: The South West of the large island off the north coast of Tasmania
Contact:

Re: Accusim & the single Spitfire...Simulator Cockpit

Post by Killratio »

G'day Anders,

Short answer is that i had a problem with photobucket that took ALL my photos off ALL fora. I have it on my "list of things to do" but that is not short!!

In the mean time, here are a few in some sort of build order:

Image

Image

Image

Image

Image

Image

Image

Image

Image

Image

Image

Image

Image

Image

Image

Image

Image

Image

Image

Image

Image

Image

Image

Image

Image

Image

Image

Image

Image

Image

Image
<Sent from my 1988 Sony Walkman with Dolby Noise Reduction and 24" earphone cord extension>


Image

User avatar
Killratio
A2A Spitfire Crew Chief
Posts: 5785
Joined: 29 Jul 2008, 23:41
Location: The South West of the large island off the north coast of Tasmania
Contact:

Re: Accusim & the single Spitfire...Simulator Cockpit

Post by Killratio »

And I might add that I have just spent an enjoyable two days with Norforce while he worked his way through half a squadron of Spitfires in the Sim. :) :) :) It is quite a steep learning curve going from a mouse to sitting in a 1:1 operating replica!!

(Ask us about our two for one training offer on three pointers :) :) :) )


Cheers Ron, it was a BLAST and you handled her like a pro!!!!!
<Sent from my 1988 Sony Walkman with Dolby Noise Reduction and 24" earphone cord extension>


Image

User avatar
Lewis - A2A
A2A Lieutenant Colonel
Posts: 33306
Joined: 06 Nov 2004, 23:22
Location: Norfolk UK
Contact:

Re: Accusim & the single Spitfire...Simulator Cockpit

Post by Lewis - A2A »

Lmao nice. Next time if you can grab some video of it in action even crashing down to earth with Norforce at the control hehe ;)

Thanks for updating the thread with some images again :)

Cheers,
Lewis


Sent from my iPhone using Tapatalk
A2A Facebook for news live to your social media newsfeed
A2A Youtube because a video can say a thousand screenshots,..
A2A Simulations Twitter for news live to your social media newsfeed
A2A Simulations Community Discord for voice/text chat

User avatar
Killratio
A2A Spitfire Crew Chief
Posts: 5785
Joined: 29 Jul 2008, 23:41
Location: The South West of the large island off the north coast of Tasmania
Contact:

Re: Accusim & the single Spitfire...Simulator Cockpit

Post by Killratio »

Ron did get some video of me doing (perfect) three pointers..but I think he deleted it in disgust after bending his third or fourth mount ... ;) :) :) :)
<Sent from my 1988 Sony Walkman with Dolby Noise Reduction and 24" earphone cord extension>


Image

User avatar
Lewis - A2A
A2A Lieutenant Colonel
Posts: 33306
Joined: 06 Nov 2004, 23:22
Location: Norfolk UK
Contact:

Re: Accusim & the single Spitfire...Simulator Cockpit

Post by Lewis - A2A »

Hope that video surfaces soon :)
A2A Facebook for news live to your social media newsfeed
A2A Youtube because a video can say a thousand screenshots,..
A2A Simulations Twitter for news live to your social media newsfeed
A2A Simulations Community Discord for voice/text chat

User avatar
Norforce
Senior Master Sergeant
Posts: 1894
Joined: 09 Apr 2010, 17:14
Location: Geraldton, Western Australia

Re: Accusim & the single Spitfire...Simulator Cockpit

Post by Norforce »

Killratio wrote:And I might add that I have just spent an enjoyable two days with Norforce while he worked his way through half a squadron of Spitfires in the Sim. :) :) :) It is quite a steep learning curve going from a mouse to sitting in a 1:1 operating replica!!

(Ask us about our two for one training offer on three pointers :) :) :) )


Cheers Ron, it was a BLAST and you handled her like a pro!!!!!

Great two days mate would be back in a heart beat
Ron
B-17 AIRFRAME 710 HRS PLUS AND CLIMBING
ImageImageImageImage


Image
GIGABYTE X58A-UD5 MB, INTEL I7 950, 12GB DOMINATOR-GT DDR3 RAM, WIN7 64, GIGABYTE SUPER OVER CLOCK GTX 560 TI 1GB GGDDR5 1000Mz, CORSAIR 850W PS, NOCTUA NH-D14,
TRACKIR 5 & TrackClipPro

User avatar
Killratio
A2A Spitfire Crew Chief
Posts: 5785
Joined: 29 Jul 2008, 23:41
Location: The South West of the large island off the north coast of Tasmania
Contact:

Re: Accusim & the single Spitfire...Simulator Cockpit

Post by Killratio »

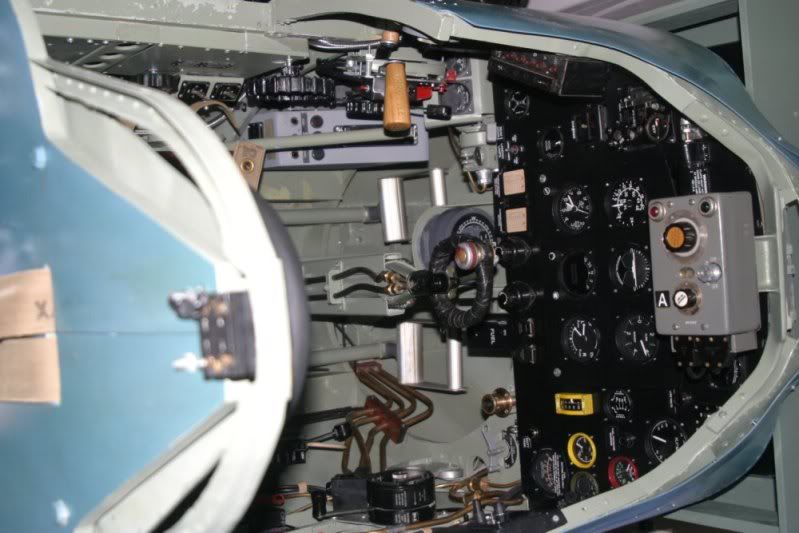
Before being dragged back into reality, I've spent a few days over the last week almost finishing the Spitfire. A few, "I'll get to it one day" type jobs.

So here it is, the second to last "final" additions post :) (The last being the now reconsidered, reconsidering of the thought of potentially thinking about finishing off by putting in a Spit I pump undercarriage and cockpit sidewall airscrew control).

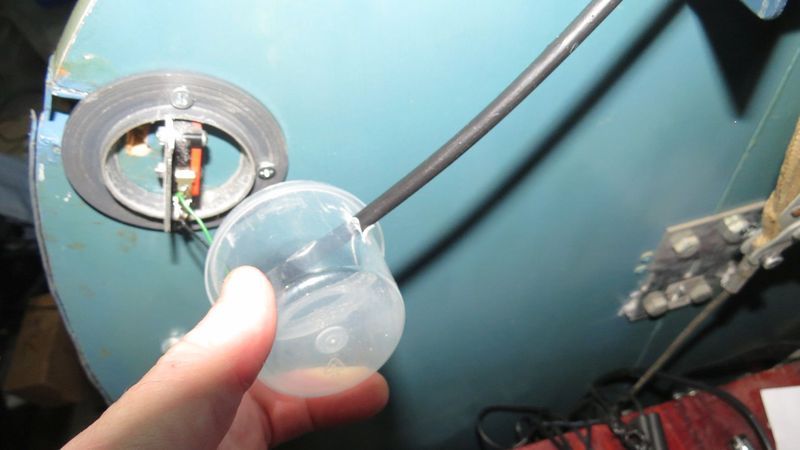
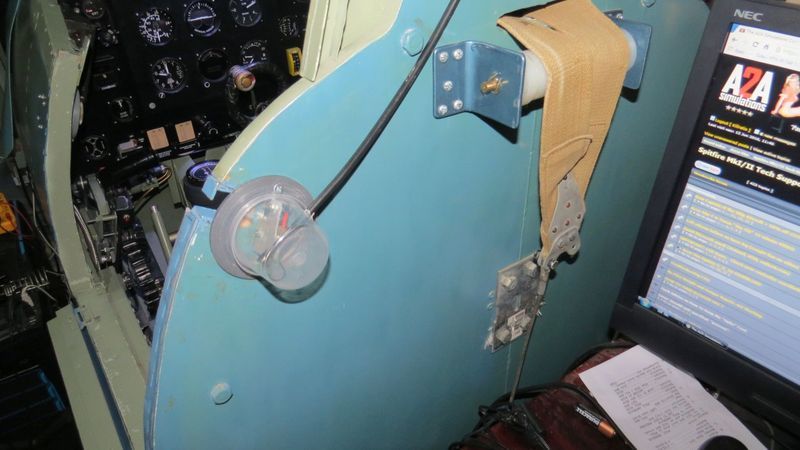
The first job was to install the long overdue isolation switch for the door/canopy. So now if the cockpit door is not fully closed, the canopy will not close...this is because "half lock" on the real aircraft stops the canopy coming forward as the guide rail slots into the top of the door and is misaligned until fully closed.

Image

Image

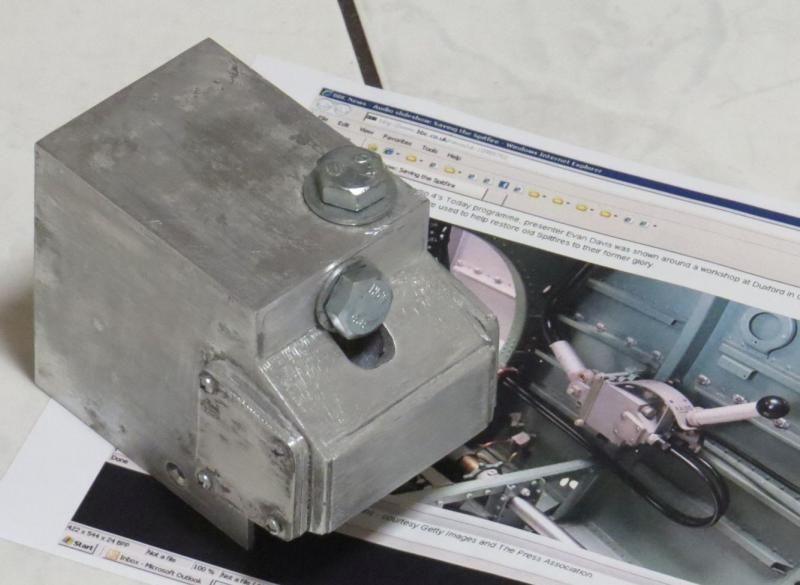
It works by the claw on the door lock slotting in and hitting a limit switch. The cover is to protect me as I use my internet computer from hitting the sharp edges of the frame! I machined a cover base with protruding edge that an old cup cover, I had, would fit onto.

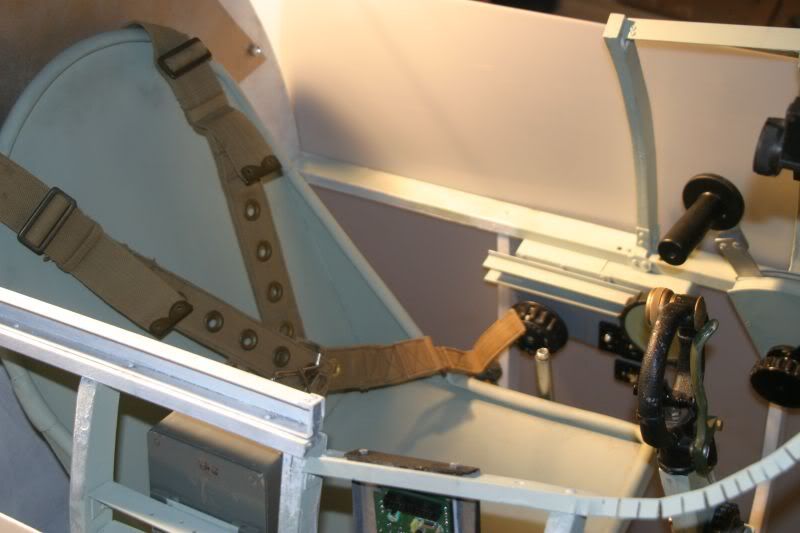
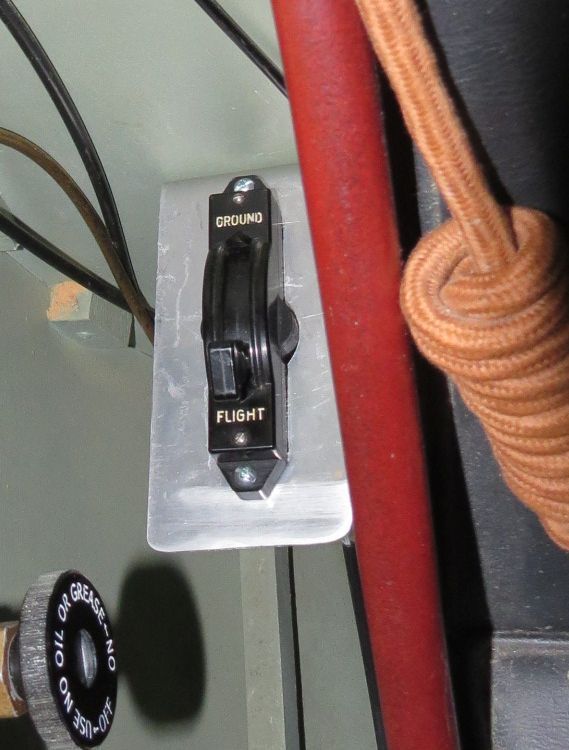
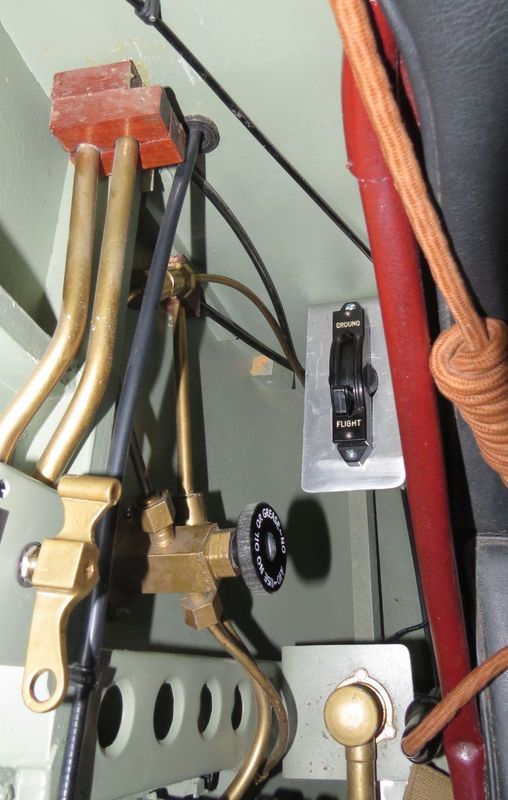
Next was to install a very solid 5 inch Ground/Flight power switch that I bought after the sim was going to be a Mk IX, while it was slated as a Mk V and before it got redesigned as a Spit I / II (yeah, I get confused too).... The power switch finally allowed me to isolate the 12 volt AT Power supply source for the gauges steppers, backlights and downlights and indicator lights from the mains.

Image

It is mounted low and near the seat back on the starboard side of the cockpit.

Image

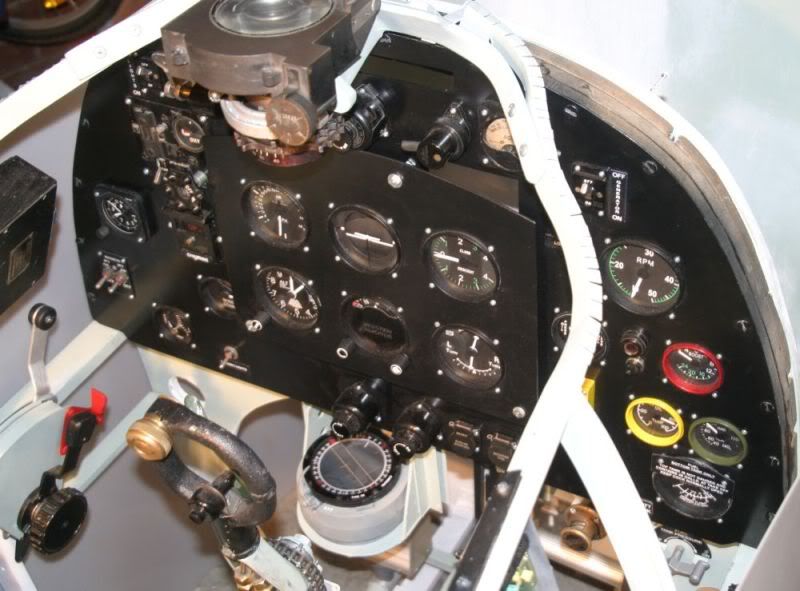
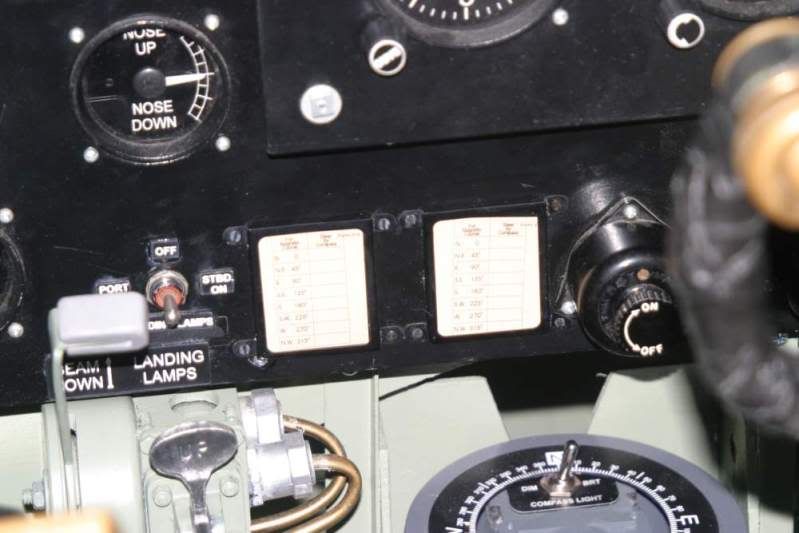
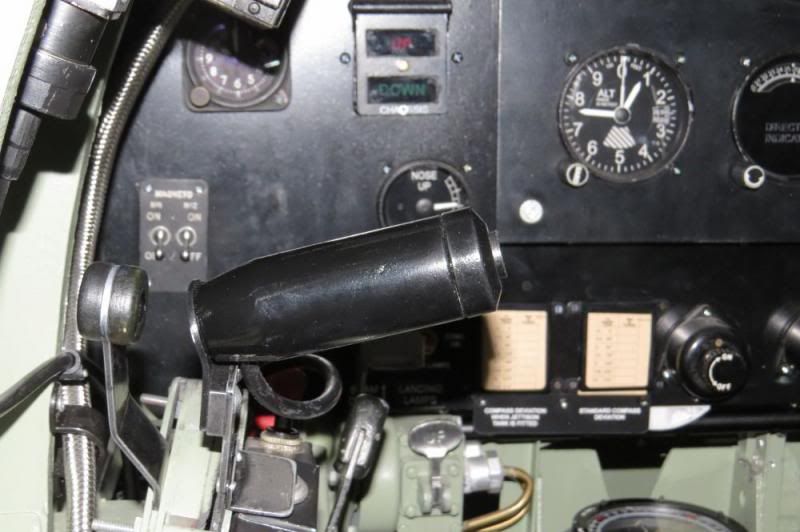
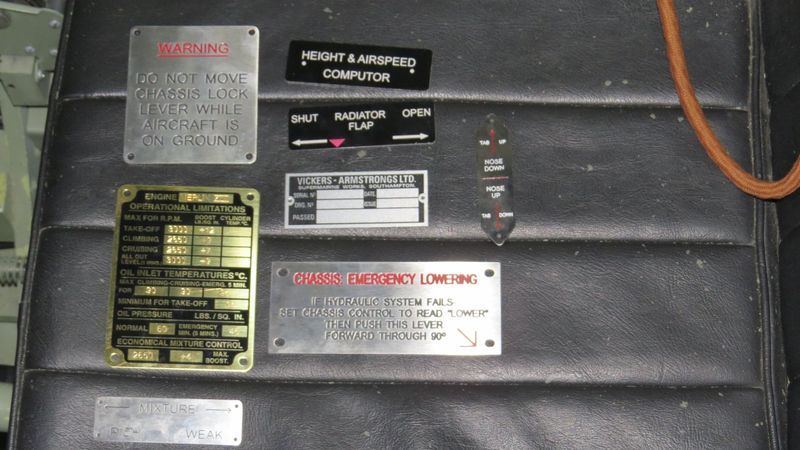
And a quick shot of the stainless steel and Brass Spitfire I type cockpit plackards engraved for me by Chris. The limitations plate is a real "new old stock" and so joins the list of real parts in the sim.

Image

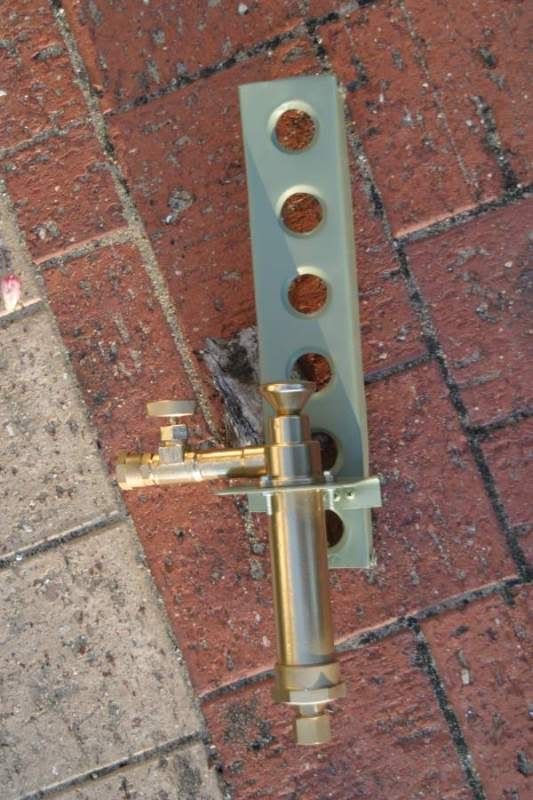
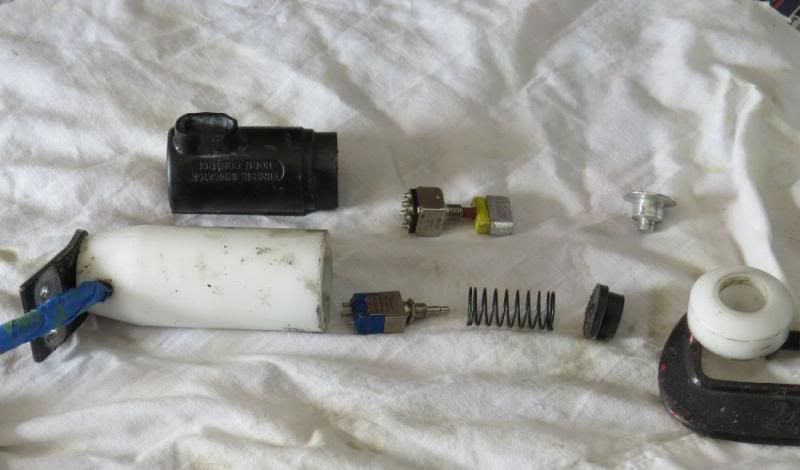
And speaking of real parts...the Kygas Primer has been a nice prop for a long while now but was non-functioning (the "Boost Coil" button served as primer. Well, with the help of a magnet and a magnetic switch, the actual Primer is now used for the job, the piston having a magnet screwed into the a rubber seal and a "break to make" magnetic switch is slotted into the end of the chamber triggering the action on openning..the time delay works perfectly with the action in the sim. (which is why I chose break to make instead of the other way around). Maybe some video to show the action soon.

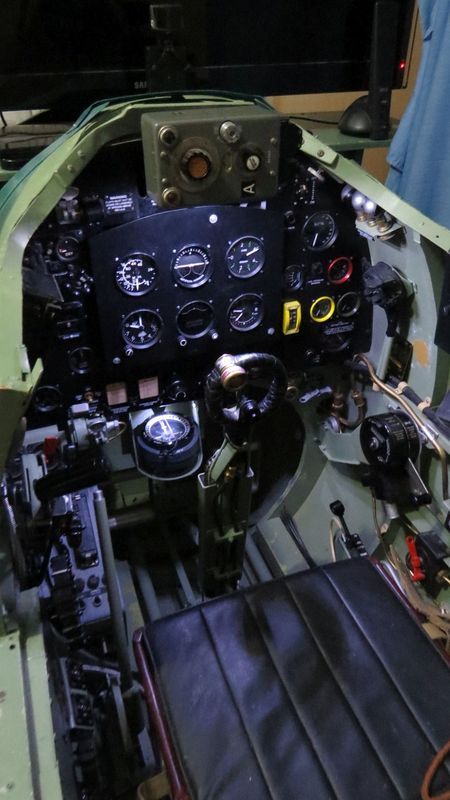
Last but not least, the new lighting...the Spitfire lighting was terrible but out in the sun, it doesn't matter, the cockpit is quite bright...but in a room it is hard to see anything down inside. A set of downlights has cured that and is a good compromise...so now in a darkened room, it looks like this:

Image

I'm just sorry all of this couldn't get done before Norforce visited...COME BACK RON!!! :) :)
<Sent from my 1988 Sony Walkman with Dolby Noise Reduction and 24" earphone cord extension>


Image

new reply

Return to “Spitfire MkI/II”

Who is online

Users browsing this forum: No registered users and 27 guests